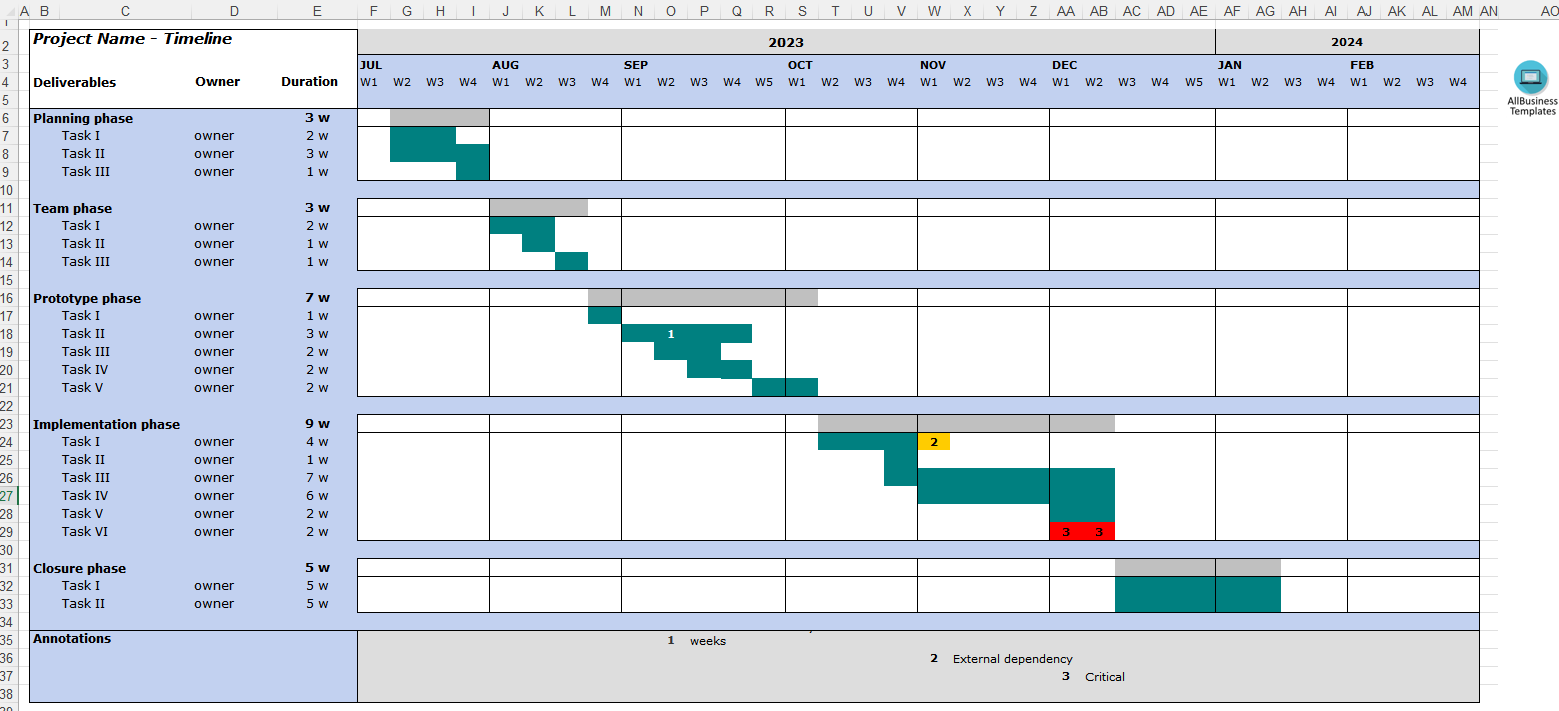
Timeline template

Opslaan, invullen, afdrukken, klaar!
How to make a Timeline in Excel? An easy way to create your personalized spreadsheet is by downloading this Excel sheet now!
Beschikbare bestandsformaten:
.xlsx- Gevalideerd door een professional
- 100% aanpasbaar
- Taal: English
- Digitale download (38.36 kB)
- Na betaling ontvangt u direct de download link
- We raden aan dit bestand op uw computer te downloaden.
Zakelijk project tijdlijn spreadsheet Taak Fase Eigenaar Project Management tijdlijn Lege tijdlijn Tijdlijn template Word Project Management Tijdlijn Voorbeeld Excel werkblad Excel sjabloon beste excel templates sjabloon Excel spreadsheet tijdlijn template lege tijdlijn pdf afdrukbare tijdlijn template blanco tijdlijnsjabloon voor studenten tijdlijn template voor kinderen tijdlijn template voor studenten tijdlijnsjabloon kinderen tijdlijn template Google Docs tijdlijn template gratis download PowerPoint-tijdlijnsjabloon bruiloft tijdlijn template gratis tijdlijn template lege tijdlijnsjabloon tijdlijn PowerPoint template gratis pijl tijdlijn template gratis verticale tijdlijnsjabloon PowerPoint
How to make a Timeline in an Excel template spreadsheet? The best way is by downloading this sample Timeline template now!
This Excel or Google Sheets spreadsheet is an interactive digital worksheet in tabular form and designed to organize information and perform calculations with scalable entries. It's not a matter of being a beginner or professional, from all over the world, are now using spreadsheets to create tables, calculations, comparisons, overviews, etc. for any personal or business need.
Google Docs or Google Sheets doesn't have a built-in feature specifically designed for creating interactive timelines. However, you can create a basic textual timeline in Google Docs or Google sheets using text boxes, tables, or a combination of text and shapes. Here's a step-by-step guide on how to create a basic timeline:
Method 1: Using Text Boxes
- Open your Google Docs document.
- Click "Insert" in the top menu.
- Choose "Drawing" and then select "+ New."
- In the Drawing window that appears, click on the text box icon (T) in the toolbar.
- Click and drag on the canvas to create a text box.
- Add a date or event to the text box, and you can format it as needed using the text formatting options in the Drawing window.
- To add more events or dates to your timeline, click the "Text box" icon again and create additional text boxes.
- Arrange the text boxes on the canvas to create your timeline, connecting them in chronological order.
- Once you're satisfied with your timeline, click "Save and Close" in the Drawing window.
- The drawing will be inserted into your Google Docs document. You can resize it and adjust its placement as needed.
Method 2: Using Tables
- Open your Google Docs document.
- Click "Table" in the top menu and choose the number of rows and columns you need for your timeline.
- Enter the dates or events in the cells of the table, placing them in chronological order.
- You can format the table to make it look more like a timeline by removing borders, changing cell colors, or adjusting font sizes.
- You can also insert additional rows as needed to add more events or details to your timeline.
Method 3: Combining Text and Shapes
- Open your Google Docs document.
- Click "Insert" in the top menu.
- Choose "Drawing" and then select "+ New."
- In the Drawing window, use the shapes and text tools to create your timeline. You can use lines, arrows, rectangles, and text boxes to represent dates and events.
- Add labels and descriptions as needed to each shape or text box.
- Arrange the shapes and text on the canvas to create your timeline.
- Once you're satisfied with your timeline, click "Save and Close" in the Drawing window.
The drawing will be inserted into your Google Docs document. You can resize it and adjust its placement as needed.
Please note that while these methods allow you to create basic timelines in Google Docs, they are not as interactive or visually dynamic as dedicated timeline tools or software. If you require more advanced timeline features, you may want to consider using specialized timeline software or online tools and then embedding the timeline into your document using a link or image. Additionally, Google Docs may have introduced new features or add-ons for creating timelines since my last update in September 2021, so it's worth exploring any recent updates or third-party solutions for enhanced timeline creation.
This useful timeline worksheet will make the task a little easier and can be used for organization, analysis, accounting, and storage of data in order to increase your productivity. This Timeline template gives you a head start and is useful because it also has the basic formulas included. If time and quality are of the essence, this worksheet can certainly help you out!
Download this Timeline template spreadsheet directly to your computer, open it, modify it or print it directly. You'll see it is a great way to increase your productivity and to bring your task to a successful ending!
Click here if you want to create a timeline in Google Docs with this Timeline Google Docs template.
DISCLAIMER
Hoewel all content met de grootste zorg is gecreërd, kan niets op deze pagina direct worden aangenomen als juridisch advies, noch is er een advocaat-client relatie van toepassing.
Laat een antwoord achter. Als u nog vragen of opmerkingen hebt, kunt u deze hieronder plaatsen.
